Log cabins are beautiful, rustic spaces that bring a sense of comfort and connection to nature. However, just like any other type of home, log cabin interior walls require regular care and maintenance to keep them looking their best. Whether your cabin is a seasonal getaway or your year-round residence, learning how to clean log cabin interior walls properly can help preserve the wood, protect against potential damage, and maintain the cabin’s cozy charm.
In this step-by-step guide, we’ll guide you through an easy, step-by-step method for cleaning your log cabin interior walls. We’ll discuss everything from the proper tools and cleaning agents to removing stubborn stains and maintaining the integrity of your wood.
Why Cleaning Your Log Cabin Walls Is Important
You might wonder, “Why should I spend time cleaning my log cabin walls?” While log cabins are built to stand the test of time, moisture, dust, and dirt can slowly degrade the quality of the wood. Regular cleaning isn’t just about appearance—it’s also about protecting the integrity of the wood.
For instance, dirt and dust can accumulate over time and make the wood appear dull and old. If they are not treated, they even scratch the surface, inflicting long-lasting damage. On top of that, humid places or poorly ventilated areas can promote mold or mildew growth, which, if not handled immediately, will ruin your logs and make your interior unhealthy.
Cleaning the interior walls of your log cabin also assists in enhancing indoor air quality, decreasing allergens, and generating a clean, welcoming environment.
Tools You’ll Need to Clean Log Cabin Walls

Before you start, gather the right supplies to ensure an effective and safe cleaning process. Here’s a list of essentials you’ll need for cleaning log cabin interior walls:
- Microfiber cloths or soft brushes: These will assist you in dusting and wiping the walls without harming the wood.
- Vacuum with a brush: A vacuum with a brush is perfect for cleaning in between grooves or cracks and higher areas.
- Wood cleaner or mild dish soap: These mild cleaners will not damage the wood and will assist in removing tough grime.
- Sponge or soft cloths: These must be employed to wipe down walls after scrubbing.
- Bucket of warm water: This will be used to thin your cleaning solutions.
- Used rags or towels for drying: After washing, make sure to dry the walls properly to avoid water accumulation.
Having the right tools ensures that the cleaning process goes smoothly without causing any damage to the wood or leaving residue behind.
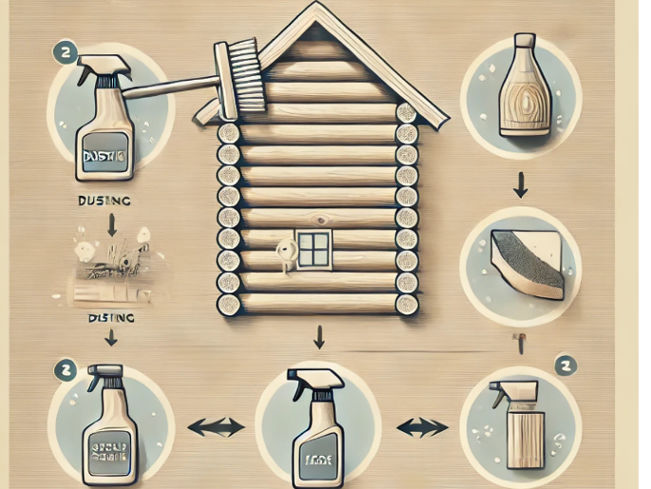
Step 1: Dusting and Vacuuming
The first step in cleaning your log cabin interior walls is to remove any surface dust and debris. This may seem like a small task, but dusting regularly is essential for maintaining the health of your wood.
How to Dust Your Log Cabin Walls:
- Begin by using a soft-bristled brush or microfiber cloth to sweep gently over the logs. These will remove dust and dirt without scratching or damaging the wood surface.
- Clean any crevices or hard-to-reach areas with a vacuum and brush attachment. Cobwebs and dust can form in cracks or around beams, so be sure to get to these areas as well.
Remember, it’s important not to use abrasive brushes or harsh chemicals at this stage—these can damage the finish or scratch the surface of your logs.
Step 2: Spot Cleaning Stains and Marks
After dusting, you may notice some stains or marks on the log cabin interior walls that need a bit more attention. Stains from food, drink, or dirt can easily accumulate, especially in high-traffic areas like entryways or around fireplaces.
How to Clean Stains:
- Mild Cleaning Solution: Combine warm water with a mild wood cleaner or a touch of mild dish soap. Never use strong chemical cleaners that might remove the natural oils from the wood.
- Test First: Test your solution first on a small, hidden portion of the wall before you apply it to larger areas.
- Apply with a Soft Cloth: Wet a soft cloth or sponge with your cleaning solution and softly rub over the stained area. Do not wet the cloth too much so as not to leave too much moisture.
- Wipe and Dry: Once the stain has been removed, wipe the area with a dry, clean cloth to make sure that there is no moisture remaining on the wood.
If it’s particularly difficult, add a tiny amount of white vinegar to a solution you would use normally; the vinegar should dislodge resistant grime but won’t hurt the finish.
Step 3: Tackling Mildew and Mold
Log cabins are often found in remote, wooded areas, which means they can be more susceptible to mildew or mold due to moisture. Mold not only affects the appearance of your walls but can also lead to long-term damage if left untreated. Fortunately, cleaning mold from log cabin interior walls is fairly straightforward when you follow the right steps.
How to Remove Mold or Mildew:
- Vinegar Solution: Combine equal amounts of water and vinegar in a spray bottle. Vinegar is a non-toxic, natural cleaner that can easily destroy mold spores without harming your wood.
- Spray Affected Areas: Gently spray the solution onto any visible mold or mildew areas, making sure to get all affected areas. Allow it to sit for around 10-15 minutes.
- Scrub with a Soft Cloth: Scrub off the mold with a soft cloth or sponge. Avoid using rough brushes or rough scrubbing since it can leave scratches on the wood.
- Dry Thoroughly: Dry the walls thoroughly with a clean towel after cleaning to avoid moisture seeping into the wood and causing more damage.
If the mold problem persists or has spread extensively, it’s a good idea to consult with a professional cleaner who specializes in wood maintenance.
Step 4: Rejuvenating the Wood with a Finish
If your log cabin walls are looking a bit dull, applying a wood finish can help bring back their natural shine and preserve the wood for the long term. Wood finishes protect against moisture, stains, and damage while enhancing the wood’s natural beauty.
How to Apply a Wood Finish:
- Choose the Right Finish: Select a wood finish that suits the look of your cabin. Options include oil-based finishes for a more natural, matte finish, or water-based finishes for a shinier look.
- Clean the Walls: Make sure the walls are thoroughly cleaned and dry before applying any finish.
- Apply the Finish: Using a clean, soft brush, apply a thin coat of finish along the grain of the wood. Make sure the layer is even and smooth.
- Allow to Dry: Let the finish dry according to the manufacturer’s instructions before applying a second coat, if necessary.
- Buff and Polish: After the second coat dries, you can lightly buff the surface to achieve a glossy look if desired.
Applying a wood finish not only enhances the beauty of your log cabin interior walls but also provides a protective layer that can help prolong the lifespan of your cabin.
Step 5: Preventing Future Issues
Once your log cabin interior walls are clean, it’s important to take steps to prevent future build-up of dirt, mold, or other damage.
Preventative Tips:
- Regular Dusting: Dust your walls at least once a month to avoid the accumulation of dirt and grime.
- Humidity Control: If you live in a particularly humid area, consider using a dehumidifier or moisture barrier to reduce the risk of mold.
- Proper Ventilation: Make sure your cabin has good airflow. Open windows or use fans to keep the air circulating and prevent excess moisture.
Final Thoughts
Cleaning log cabin interior walls is an essential part of home maintenance that will help preserve the beauty of your cabin for years to come. By following the steps outlined above, you can maintain a clean, healthy, and inviting space that reflects the rustic charm of your log cabin. Whether you’re preparing for guests or just looking to refresh your home, regular cleaning is key to keeping your cabin in top shape.
Remember, when cleaning your log cabin, use the appropriate tools and cleaning products. Be kind to the wood and avoid over-saturating the surfaces so as not to cause water damage. With a little attention and care, your log cabin walls will remain radiant and create a warm, inviting environment for years to come.